Group2 AP Exercise
From School2007
Contents |
[edit] Activity 1: Connect to the arpl-lab network
We had to do:
"Connect one computer to the arpl-lab access point and browse the Internet. Post the results to your diary page.
You should connect using both Windows XP and Linux.
Linux login: arpllab password: wifilab"
On Laptop with Windows XP it was quite easy because we've already done it on the first day. We wanted to have Internet connection so we just done it on the begining of the school. We actualy had to configure wireless connection to labotarory Access Point only on Linux - it wasn't difficult to much ;)
"We were able to connect our laptop using both Windows XP and Linux to the arpl-lab access point and browse the Internet. In the first stage make sure our wireless adapter card was actived. Then check our available wireless connection to SSID name arpl-lab and select it...so it's work!!!!"
[edit] Activity 2: Connect your group's network to the wireless network
We had to do:
"Disconnect your group's switch from the wired network. Create a connection from your group's local network to the arpl-lab network using only one radio card.
All computers connected to your local network should be able to browse the Internet via the wireless link."
Most of us has ever configured such device like Access Point. We actualy had to connect the WAN interface of Access Point to our switch and configure AP to provide Access on his wireless interface. We have choosen channel 11 and we nemed our network as 'G2'. After this activity we could connect our laptops to thhis network.
[edit] Activity 3: Install an access point
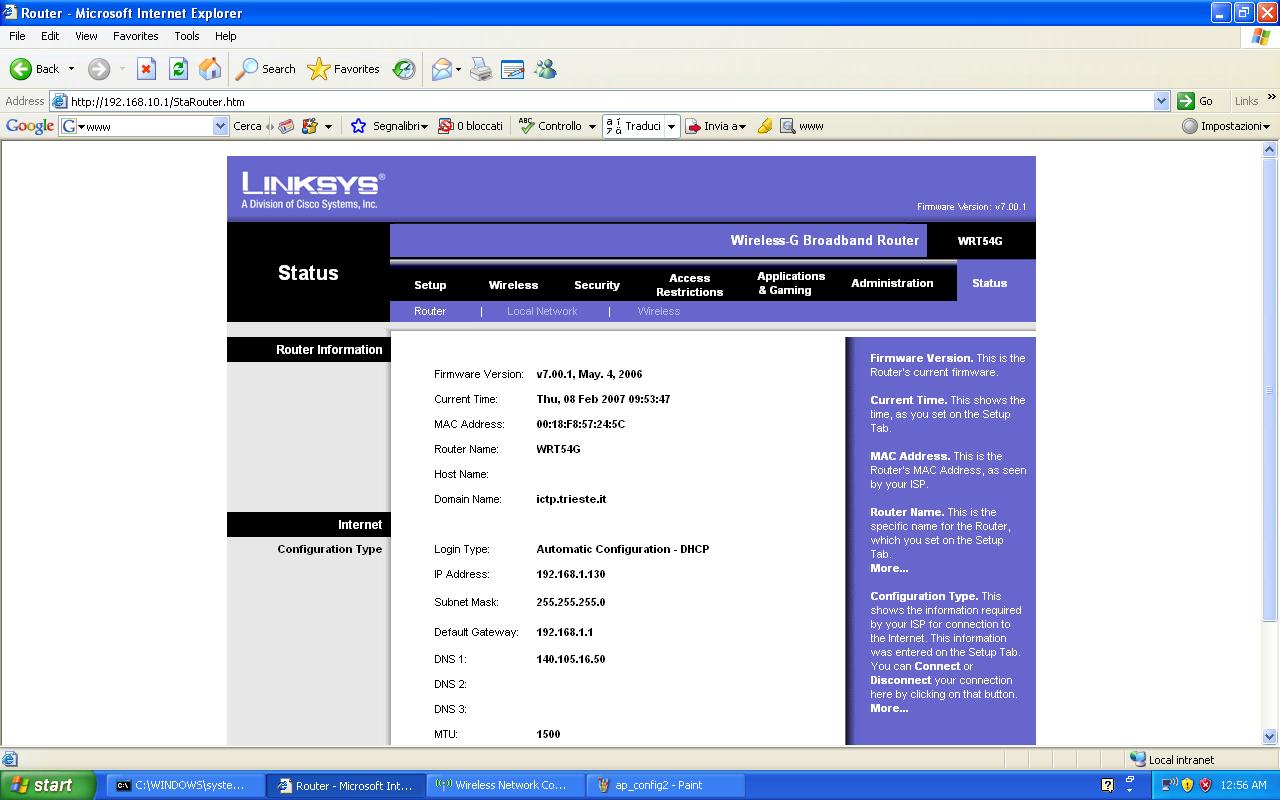
Add an access point to your group's network. Set the name of the network to your group's name, and select an appropriate channel (and other wireless settings, if necessary.) 140.105.16.50 is the DNS
[edit] Network Design
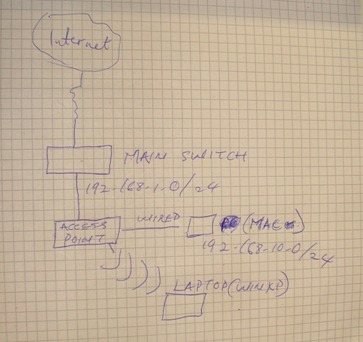
- The two access points are connected to the group's switch .
- The group's switch is connected to the main lab switch.
- The access points are configured as an internet gateway for wireless and wired clients.
- The access points run a dhcp sever.
[edit] Configuring the Access Point
- With a web browser, we logged in to 192.168.1.1
- At the prompt, we left the usename blank and we used admin as the default pasword .
- Access point set up:
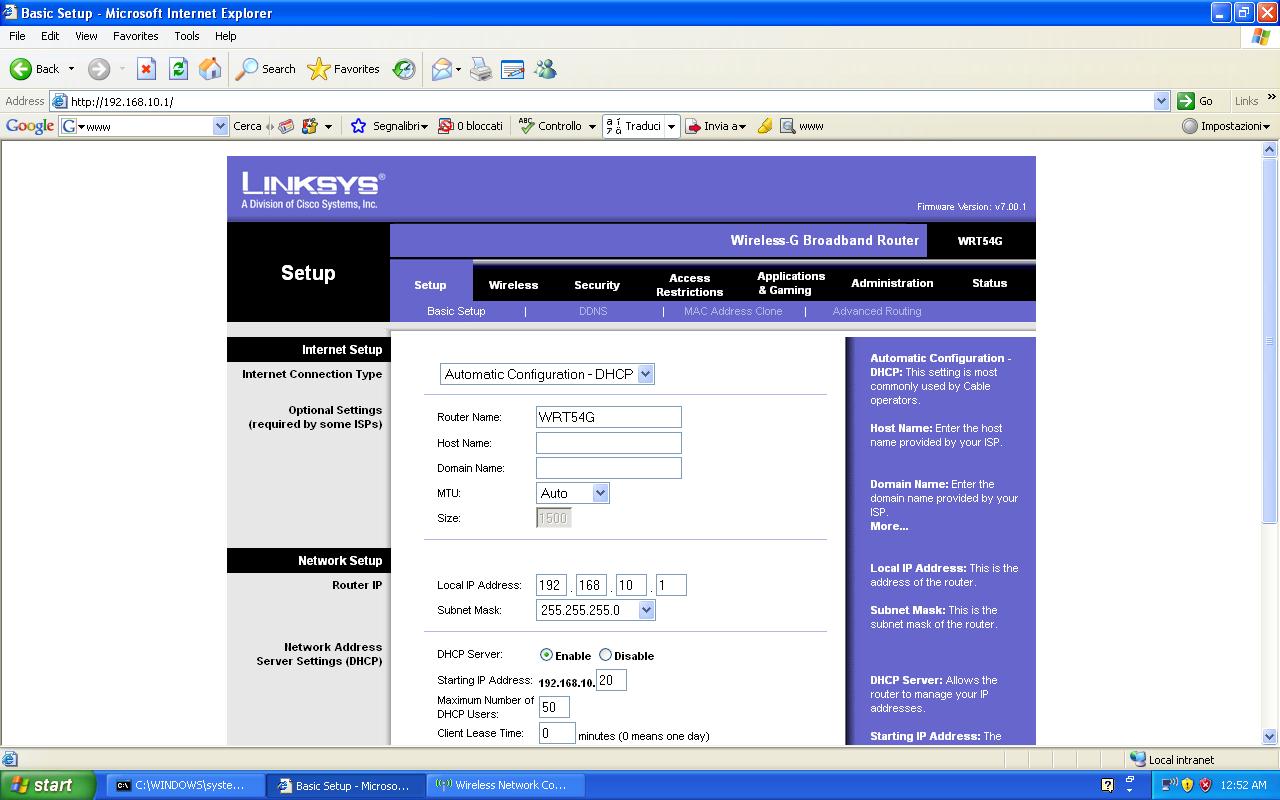
[edit] 1. Setting up DHCP

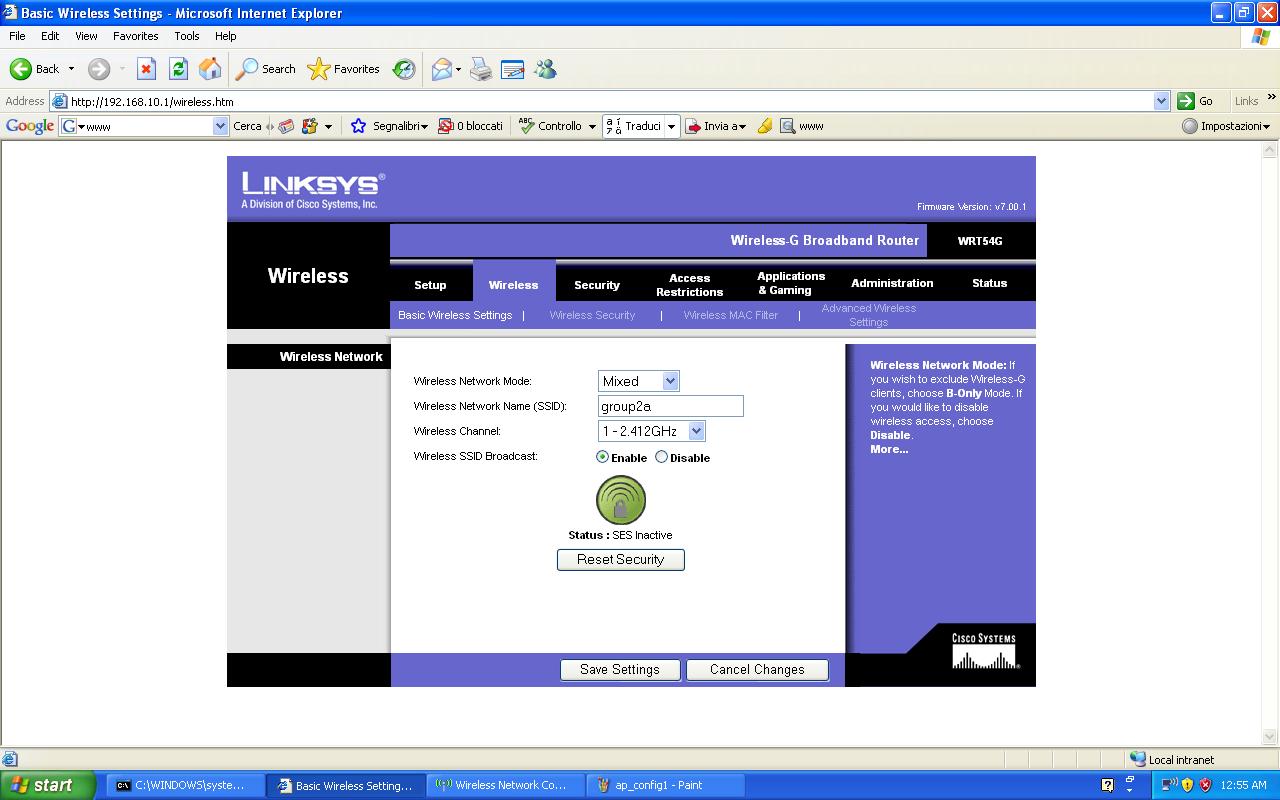
[edit] 2.Settig up SSID & the channel

[edit] 3.Access point status

[edit] 3.Schemat of our configuration

[edit] During configuration


[edit] Activity 4: Become a wireless ISP
We had to do:
"All groups will take turns becoming a wireless ISP. Group one will be the first ISP, using the Ethernet connection to the lab network. The groups must work together to connect their own local wired network to the ISP via wireless. Be sure to consider:
Wireless settings (channel, AP vs. Client, etc.) Network settings (IP addresses and routes) Efficiency and redundancy After all groups have connected to the Internet via the wireless, it will be Group two's turn to be the ISP, and Groups one and three must connect over the wireless to the Internet. And so on.
- Group1 as ISP
We used groupone as ISP . We used our access point in the client mode to connect to our wireless ISP. Hosts in our local network are configured to get their IP addresses dynamically through the lynksys WRTG54 .
- Group2 as ISP
We became a ISP (Internet Provider) for others group. They used our wireless connection to access to the Internet.Actualy we connect our WAN interface on Pccess Point to the main switch in lab, then we configureour Access Point as DHCP server (IP address subnet: 192.168.9.0/24) and we changed the settings on wireless interface.We chouse channel 11 and we typed the name for this network: 'Group2isp'. After it we just told other groups what our settings were and they could connect to us. We protected our subscribers by NAT translation - all computers in our network had the same public IP address in Internet.
- Group3 as ISP
We used the same configuration that we did when connected to group one .
[edit] Activity 5: DD-WRT
We had to do:
"Download this image to disk: http://school2007.hackerfriendly.com/files/dd-wrt.v23.std.zip
(For future reference, it is also available from http://www.dd-wrt.com/)
Install it to your Linksys WRT54G access point (version L or < 5)"
We download the new software for the one of our Access Points. Upgreating was very easy - we had to open in the web browser (Internet Explorer 6.0) management page of the Access Point, we wanted to upgreat. Access Point by default can be configured under IP address: 192.168.1.1.
We opened the page 'Firmware upgreate' and browse corect file. Upgraeting take few minutes and after if we had a brend new software with new functionality.

To connect our AP to other Access Point we had to change the mode Access Point is operating to 'Client mode'.

Client mode on our Access Point let us connect to Group3's Access Point. Group 3 were in this activity uoer ISP (Internet Provider). To connect to the our ISP we had only to choose the SSID (name) of the corect Access Point. It let us make the connection.

Group 3 was serving DHCP service on his Access Point so we even didn't have to configure our Wireless interface (on AP).
...As usualy we were first :-)
